Well hello Blog World! I am back.. it has been quite a long time. I apologize for my long absence. My husband and I bought a house and this summer has been dedicated to making it "ours" by adding our little touches. One thing that has been amazing is our Garden! Since it's new to us, every week I walk out or take a look out into the many (MANY) gardens and I see something new blooming, it's just beautiful.
I think this school year we are going to have a lot more nature themed projects because I am so inspired.
We started school last monday! We are working on our folders and doing introduction and reviews! Can't wait til Thursday for the 2nd cycle to begin so we can really start out main content lesson projects.
Kindergarten: Primary Shape Mobile
1st Grade: Realistic Owls focusing on texture- Black paper/construction paper crayons
3rd Grade: Barn/Farm Landscape- focusing on Patterns/Foreground/ Middle Ground/ Background/Form
4th Grade- Optical Illusion Hands
This year I would like to post every week. If you notice that I am not and your curious about a lesson/procedure/idea. Let me know!
Have a great day and Happy Art Making! :)
Monday, September 2, 2013

Sunday, January 6, 2013
Kindergarten Muddy Pigs

This is one of my favorite projects to do with Kindergarten. I usually do this project to introduce/review basic shapes, and how to make shapes to create an animal.
I use 9" x 12" white construction paper. We usually read a story and/or discuss information about pigs.
We draw in pencil and outline with medium Sharpie Markers. YES, I said Sharpie Markers with KINDERGARTENS.
I feel with great explanation and expectations, I usually do NOT have a problem with misuse of the Sharpies. Sometimes we use Black Crayola Markers to outline.
They use crayons to color in and then to finish the projects they use brown tissue paper to add more "mud" to their pigs. They can crumble the tissue paper or keep the tissue flat.


I love all the personalities and how all the environment have a little different interpretation.
Saturday, January 5, 2013
One-Point Perspective Barn and Pumpkin Patches

(4th grade student work, love the colors and details, esp. the windmill in the background and sheep)
This project was completed by my fourth grade students in October. I originally found this idea on pinterest, here and wanted to add the (3-Dimensional) barn for my students to have experience drawing a one-point perspective building. I like to look for ideas online for good lessons, but I always like to "tweek" them to make them my own and for my students particular lessons.
To start out we used 11" x 17" white construction paper. We drew a horizontal line near the top of the page. They added a dot in the middle of the line, this would be their "one-point" where all the lines point to. We added 3-4 lines to make the Pumpkin Patch rows. They added pumpkins to their patches, trying to make the lines "realistic" so the pumpkins would look rounded. Some student chose to make them into Jack O' Lanterns.
For the Barn, They drew a vertical rectangle added half a circle for the front of the roof. They use rulers, lined them up to the dot to make the side of the barn, lines.
Last but not least we added a dark blue, black, or purple watercolor wash over the crayons.


(love the haunted farm look, it was around Halloween, must have been on their minds :) )


They turned out great.
Monday, November 19, 2012
HELLO EVERYONE!
I can't believe it has been sooo long since I have updated. The School year has been hectic, but OH SO GREAT. Since we have an up and coming Holiday from Wednesday on, I will be posting... EVERY DAY. THAT'S RIGHT I said EVERYDAY!! until I have caught up on all the projects.
Thank you all for reading and posting comments. I will get better with posting. (I need to stop pinning, hahaha.. and everything else that is distracting in life)
:) Happy Monday and Enjoy your Art Making!
I can't believe it has been sooo long since I have updated. The School year has been hectic, but OH SO GREAT. Since we have an up and coming Holiday from Wednesday on, I will be posting... EVERY DAY. THAT'S RIGHT I said EVERYDAY!! until I have caught up on all the projects.
Thank you all for reading and posting comments. I will get better with posting. (I need to stop pinning, hahaha.. and everything else that is distracting in life)
:) Happy Monday and Enjoy your Art Making!
Monday, September 24, 2012
Kindergarten Primary Color Shape Mobile
This year we have some slight changes to our schedules. The unified art teachers are now teaching all the kindergarten classes, since we went to all full day kinder classes this year. I was a little nervous because with kindergarten you get so many different levels. I just want to be attentive towards their needs but also covering some of the principles and elements of design at a good pace.


I have no idea why I was so nervous, the students are doing excellent! We painted on the 3rd day. THATS right the THIRD DAY!!! NO spills, barely any messes and lots of smiles and successes.
I wanted to start out with basic shapes, drawing and cutting. We introduced outlining or tracing. We glued the shapes together. Talked about the primary colors. *** To add element of surprise and crayon resist you can have your students make designs in white crayon... they forget and when they paint the next day, it appears. You get a lot of ooooohhhh'sss and aaaaahhhh's, one class CLAPPED.
When the painting was completed we read mouse paint together and discussed primary and introduce how to make secondary colors.
These are some of my examples and one of some student work drying on the rack.. I will be posting the student work once hung in the hallway.


Student work drying

Can't wait to post the mobiles that are completed! They did such an amazing job!
Sunday, September 23, 2012
1st grade Pattern Owls
Now.. I have done this lesson before, but as you all know I love to improve/tweak projects. I tweaked this project for this year, because I wanted to incorporate color and free choice. This year I used it as the first project to review, practice and introduce pattern, basic line design, animal design, coloring and patterned border frame. Here is the post from last year.

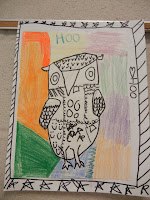

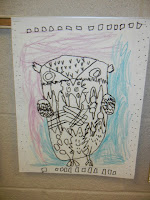
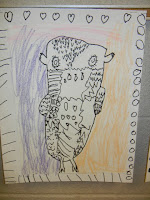

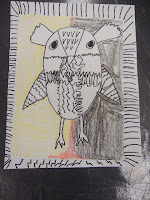
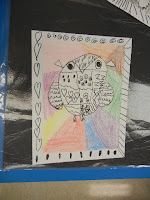

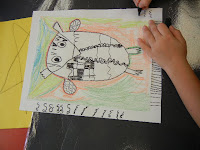

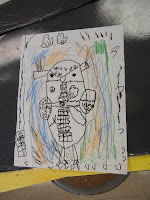
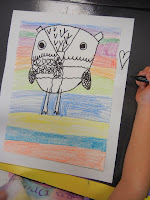

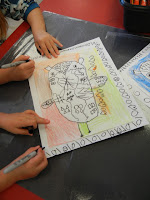
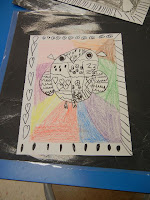

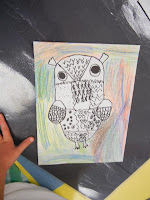
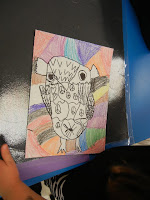
I love the students choice of coloring/pattern in the background.. and their patterns on the border.
If you do this project please link here and let me know! so I can see what you and your students do with this project OR if you have any questions.
:)


I love the students choice of coloring/pattern in the background.. and their patterns on the border.
If you do this project please link here and let me know! so I can see what you and your students do with this project OR if you have any questions.
:)
4th Grade- One Day O.P. Hands
Hello Everyone!
-This is the first project the 4th graders did this school year. I wanted to start out with a successful project, reviewing controlled line, repetition, color pattern, and optical illusions. Students loved how the hands 'pop' off the page! I did see this idea on pinterest. I saw it at theforestroom.
-I did change things up a little bit by introducing Bridget Riley, the british OP artist and I wanted them to do a rough draft and a finish draft.
-I wanted to emphasize that the making the hand so obvious wasn't the only goal, so if it wasn't obvious there were many ways to help the hand pop out.
-First way is to trace all the lines of the hand again so it darkens the lines, color in any white that is showing, or add more lines to define the hand to help it "pop" off the page.


-This is the first project the 4th graders did this school year. I wanted to start out with a successful project, reviewing controlled line, repetition, color pattern, and optical illusions. Students loved how the hands 'pop' off the page! I did see this idea on pinterest. I saw it at theforestroom.
-I did change things up a little bit by introducing Bridget Riley, the british OP artist and I wanted them to do a rough draft and a finish draft.
-I wanted to emphasize that the making the hand so obvious wasn't the only goal, so if it wasn't obvious there were many ways to help the hand pop out.
-First way is to trace all the lines of the hand again so it darkens the lines, color in any white that is showing, or add more lines to define the hand to help it "pop" off the page.


We did this on 10" x 8" paper.
Have a wonderful day, hopefully making art!
Subscribe to:
Posts (Atom)