Check out this awesome outfit! I would totally wear this outfit and I'm definitely not a 4th grader!! if you look closely the leggings are ice cream scoops! ICE CREAM SCOOPS
Don't get me started on how much i love mustaches! We gave them out at our wedding for a favor and this Halloween we had a "You are FanTASHEstic" car trunk for our churches trunk or treat. I think it just adds the right amount of silly humor!
In the ART ROOM:
4th grade: Wooden Figure Drawing
3rd: Wayne Thiebaud inspired 3 tier cakes (using DIY puffy paint made out of SHAVING CREAM)
1st: Sleeping/self portrait drawings
Kindergarten: Hot Air Balloons
BOOM! Happy Friday and Merry Art Making on this Fantastic Friday!
Search This Blog
Showing posts with label 1st grade. Show all posts
Showing posts with label 1st grade. Show all posts
Friday, November 20, 2015
Thursday, September 24, 2015
Back into the Thick of it!
Hello All!!!! I know it's like the 4th week of school but man how time flies and I just remembered that I forgot to update thee ol' blog. I am going to try to update like once a week this year.

This year I started out the year in Kindergarten with shape monsters, after being inspired by the Book, "The Monster Who Lost His Mean", by Tiffany Strelitz Haber, Kirstie Edmunds. Pictures to come.
In First Grade: We started with Warm/Cool Color Leaf Echo line Drawings. Pictures to come.
In 3rd Grade: We are working on studying the Elements of Art in depth and we are starting with LINE. We discussed lined and filled out a line design graphic organizer. We then studied different tree houses and created some beautiful tree houses. Pictures to come.
In 4th grade: We are studying the Element of Art: Color, specifically COMPLEMENTARY colors. We are doing this by creating OPTICAL illusions and adding complementary color groups to help make them POP! I know that many of you have either saw this project before or maybe have done it before with your classes but I allowed the students to color it in anyway they would like, as long as, they developed a pattern using a COMPLEMENTARY color group.
To create the "Web" we created a dot inthe middle of the paper with pencil.
We added 6 lines (from edge to edge) through the dot.
Then we added "smile" lines to every other triangle.
Then connected the "smile" lines with frown lines in all the blank triangle spaces.
We outlined with a fine sharpie marker and erased any pencil lines peeking through.
Then we discussed COMPLEMENTARY colors and did a couple of class activities.
Here are some of the end results:
Well I hope to add the k, 1, 3 projects by Monday!
Happy Art Making!!!!

This year I started out the year in Kindergarten with shape monsters, after being inspired by the Book, "The Monster Who Lost His Mean", by Tiffany Strelitz Haber, Kirstie Edmunds. Pictures to come.
In First Grade: We started with Warm/Cool Color Leaf Echo line Drawings. Pictures to come.
In 3rd Grade: We are working on studying the Elements of Art in depth and we are starting with LINE. We discussed lined and filled out a line design graphic organizer. We then studied different tree houses and created some beautiful tree houses. Pictures to come.
In 4th grade: We are studying the Element of Art: Color, specifically COMPLEMENTARY colors. We are doing this by creating OPTICAL illusions and adding complementary color groups to help make them POP! I know that many of you have either saw this project before or maybe have done it before with your classes but I allowed the students to color it in anyway they would like, as long as, they developed a pattern using a COMPLEMENTARY color group.
To create the "Web" we created a dot inthe middle of the paper with pencil.
We added 6 lines (from edge to edge) through the dot.
Then we added "smile" lines to every other triangle.
Then connected the "smile" lines with frown lines in all the blank triangle spaces.
We outlined with a fine sharpie marker and erased any pencil lines peeking through.
Then we discussed COMPLEMENTARY colors and did a couple of class activities.
Here are some of the end results:
Happy Art Making!!!!
Sunday, September 23, 2012
1st grade Pattern Owls
Now.. I have done this lesson before, but as you all know I love to improve/tweak projects. I tweaked this project for this year, because I wanted to incorporate color and free choice. This year I used it as the first project to review, practice and introduce pattern, basic line design, animal design, coloring and patterned border frame. Here is the post from last year.
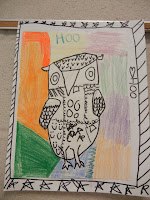
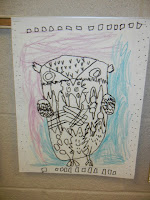
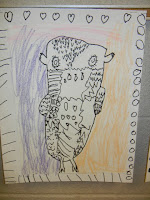
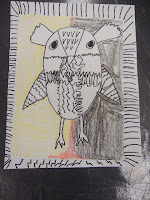
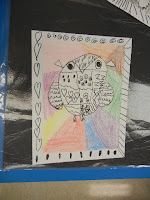
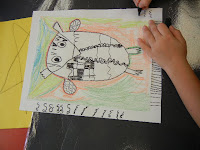
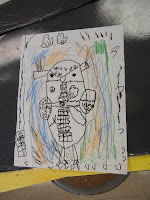
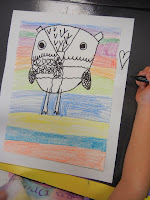
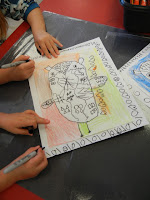
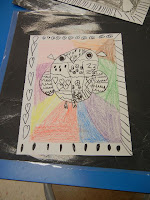
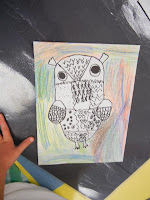
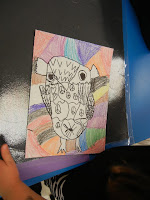
I love the students choice of coloring/pattern in the background.. and their patterns on the border.
If you do this project please link here and let me know! so I can see what you and your students do with this project OR if you have any questions.
:)


I love the students choice of coloring/pattern in the background.. and their patterns on the border.
If you do this project please link here and let me know! so I can see what you and your students do with this project OR if you have any questions.
:)
Monday, February 20, 2012
1st grade Self-Portraits
Now this is a repeat project and probably will be for the next couple of years. I learned about this project when I student taught. My co-op would give the students a "pre-test" to draw themselves without any help. Then the next 2-3 classes the students worked on drawing proportion, facial details, hair, special details like earrings, glasses, ponytails, etc. and then worked on the background. We review horizon line, line, patterns, and colors. they used crayons and markers. And of course with all my projects we outline with Black Sharpie Markers.
Wednesday, January 4, 2012
Holiday Projects
We're back to school! I have so many lesson ideas swirling in my head. HOWEVER, I have so many lessons to update to this blog... LOTS of winter/holiday projects..
Here you go!
Thanks for stopping by, please say hi, leave fun ideas, or use some of my ideas!!!
Happy Art Making!
:) Candice
Here you go!
Thanks for stopping by, please say hi, leave fun ideas, or use some of my ideas!!!
Happy Art Making!
:) Candice
Thursday, December 1, 2011
1st grade Pattern Owls
This is a great 1-2 day project.
First we drew an owl, step by step.
They we outline with sharpie markers, added patterns inside owl, then we cut and glued them to a color background.
To add another element I had the students glue their owls to a larger piece of paper, to create a border and then they add pattern designs to the border. Very graphic designer-esque.
1st grade Van Gogh Starry Night Winter Scenes
This project is fabulous! I have seen many projects inspired by Vincent Van Gogh's Starry Night. I did want the students to have to "re-do" a masterpiece. SOO I talked to the students about what being "inspired or influenced" by an artist means. So we based the bottom of the composition, usually the town in Van Gogh's work into a winter scene.
We used Construction paper crayons on Black paper. Can I just say how much I LOVE USING CONSTRUCTION PAPER CRAYONS AND SO DO THE STUDENTS!
We used 11" by 17" black paper.
With pencil : Drew 3 hills.. a snowman ( on the side where the big brown "tree", "building", "vines" etc is )
I showed them 3 different kind of pine or evergreen trees.. They has to add 3 trees. We talked about how trees in the distance would be smaller, et.
They then added 1-2 "oak" trees without leaves because it is winter.
We talked about how Van Gogh uses bold, brushstrokes or dashes. They filled each object with dashes to add texture and Van Goghs style.
Once the Land portion was completed..
We added the sky. A crescent moon, 6 or more stars. They added "halos" of dashes and they added wind, swirls, or tails with orange, yellow, and white.
Last but not least they used purples, greens, and blues to complete the sky.
Check them out:
Love the trees!
1st grade-look at those detailed dashes in the sky
Love that snowman
Fabulous!
Monday, October 10, 2011
1st grade Mondrian Butterflies
This project is actually from last Spring. I don't believe I posted this before.
We studied artist Piet Mondrian. Focusing on lines, shapes, and of course the primary colors.
We started out with 12" x 18" white piece of paper. Holding it horizontally we added a "skinny" oval in the middle of the paper and made wings on each side.
We used rulers to create 4 horizontal lines and 4 vertical lines (diagonals were allowed) We used black oil pastel to draw.
We then added primary colors "randomly" to different shapes. Cut them out and either paste on to another paper (blue) or just keep cut out.
*Modify: You could have the students mix the primary colors into secondary colors, to work on mixing colors and painting neatly. So it would be influenced by Mondrian but have a new twist, with the primary colors.
Sunday, September 18, 2011
1st Grade "Where the Wild Things Are"
So I know a lot of people have done a lesson on this Book. I really wanted to start out the year with using our IMAGINATION!
We started off by defining what imagination was and what the difference between pretend and real.
I read the story aloud, stopping to ask questions, and predictions of what will happen next.
We started out with an 8 1/2" x 11" white construction paper and pencil. I showed them some ideas on how to start out with Shapes to make the basic form of the body. Then add "details" like eyes, nose, mouth, hair, horns, tail, scales, ear rings, antlers, etc.
We focused on drawing large enough to fill the page, we discussed what a HORIZON LINE is and added one to our page.
They outline with permanent Sharpie Markers, erased their pencil lines, and then used construction paper crayons to add Bright and Bold colors.
Tuesday, April 26, 2011
1st Grade "If the Dinosaurs came Back" Dinosaur Drawings
DID YOU EVER READ THIS STORY??? It's a must.. and I love the simple Illustrations.
This book is absolutely wonderful! The author puts the Dino's in really cute and clever atmospheres! So the lesson was to draw a dinosaur (I handed out a handout that I found with all different dinosaurs on it)
The students were to try their best to create a "realistic" dinosaur and put it in an unrealistic setting.
They drew the dinos, background and outlined in Sharpie markers, and colored in with Markers and Crayons.
Subscribe to:
Posts (Atom)


