We are finishing up some projects in each grade.. stay tuned for more I will be uploading this weekend, since this week as been hectic but very awesome..
:)
Thursday, February 24, 2011
1st grade Art Show
We just had our first grade art show. It was soo great to see all the students so fancy and proud of their work. There was a concert, as well. THey did such an amazing job!
Here are some pictures:


Here are some pictures:


I had a lot of helping hands to put up these beautiful pieces of art work. Our students are so talented and creative!
Sunday, February 13, 2011
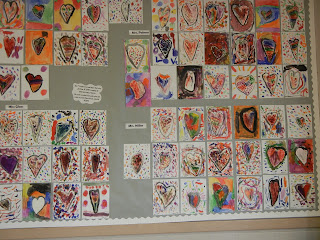
2nd Grade Jim Dine Studies
This project is a quick way of introducing Jim Dine, Color, Pattern, and a series/study in art.
We started out with a teacher made slideshow of info and images of Jim Dine's work. Then we added 6 hearts (2 rows of 3). I emphasized for the hearts to be medium. Then we used rulers to create 2 straigh lines through each row of 3 hearts.
We reviewed/introduced warm and cool colors by discussing and looking at the color wheel. I thought the best way to make it interesting and stick in their minds was to play a little education game. Whenever I would say a warm color they would act like they were really hot (fanny themselves off, saying "whoo it is so hot in here" etc.) and for cool they would shiver, rub there arms, etc. THEY LOVED IT!!!!!
Here are some examples. These lovely hearts are created on 9" x 12" white construction paper and oil pastels. Hearts were with warm colors and background with cool colors. THey were allowed to color in solidly or with patterns.
PLUS: it is a great way to do a seasonal project for Valentines Day. 2 birds with one stone.


The last one did not stick to warm and cool colors like discussed in class, however their creativity with all the colors/patterns looks wonderful!
Sunday, February 6, 2011
4th grade Fantastic Figure
Ever since the 1st day of school all of the 4th graders asked me if they could draw my wooden mannequin that stands proudly on my desk.


I had pictures up on the screen of 3 different poses. We discussed how to build a figure through shapes, emphasizing not being too "controlled" or having it to look perfect. We reviewed sketching and observing the figure.
The last pose they could come up with there own "scene". I thought after they had some experience with drawing the figure, the students named him "woody", they would feel more comfortable drawing the 4th pose.


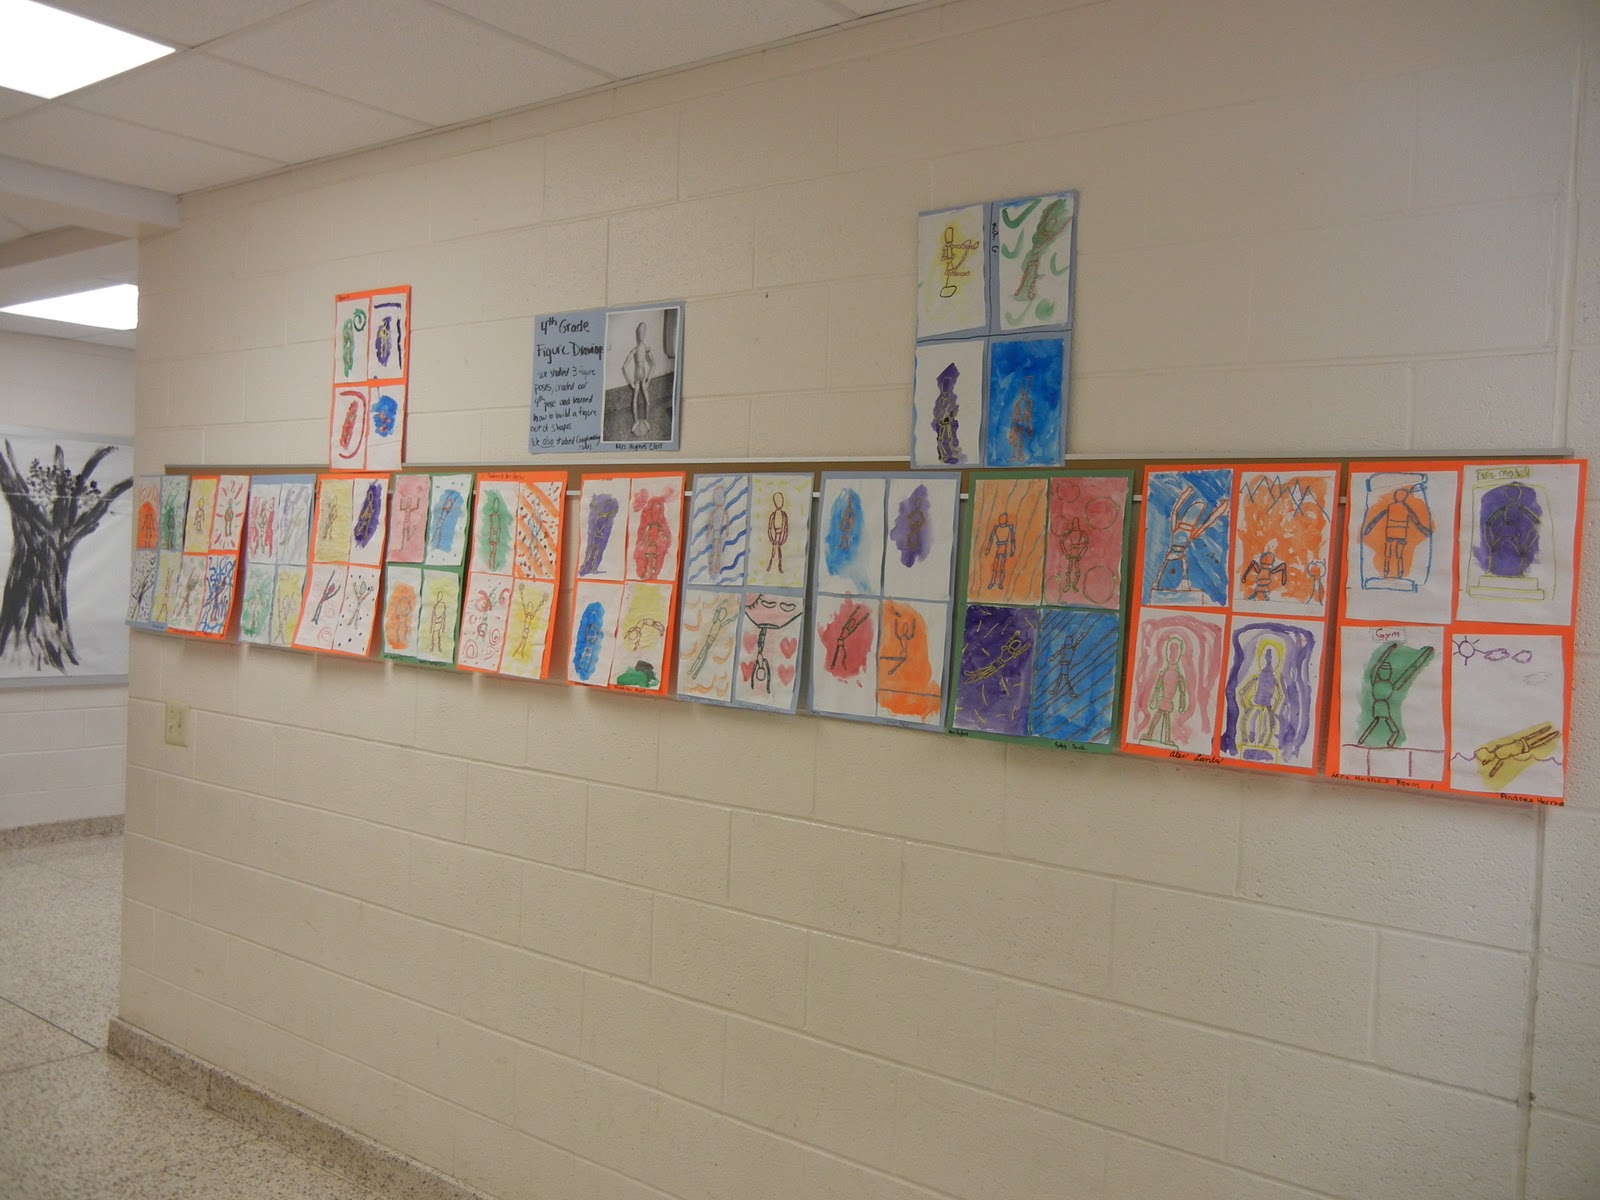
We studied complimentary colors. We used oil pastels to outline pencil lines, and then colored the color that compliments.
Here are some examples:


Wednesday, February 2, 2011
1st Grade Jim Dine Multi-Media Hearts
Now that Valentines Day is approaching, I have seen a lot of Jim Dine "heart" projects popping up on art education blogs. I'm not one for seasonal/holiday projects, but if they can study an artist that has made a living and following creating hearts, WHY can't WE?
So I have a project planned for 1st, 2nd, and 3rd based on Jim Dine. His artwork is so beautiful. He has created many ( and i mean a lot) of artwork with the subjects of "hearts" and "tools". He uses all different types of materials, 2-D and 3-D.
For this 1st grade project, I wanted to use a couple different materials. Gratefully our Library aid had all these foam pads donated to her to be used for crafts,etc. She came to me and asked if we could use them. They look like mouse pads and I started brainstorming some ideas. I asked if she had enough for us (like 180 per grade) she said she had boxes and boxes, BOY was she right!
- We started off with 8.5" x 11" white construction paper. We then drew a large heart onto the back of the foam pad ( these pads are about 7" x 6"). I showed the students how to draw a heart. They were so excited when they learned the, "draw a lower case m and then attach a v at the bottom of the m, to create the heart" and we also learned out to draw one side of the heart and attach it to another side (like a comma).
- They we glued the foam pad to the middle of the white construction paper.
- We then used water-tempura cakes to apply a black line around the heart to have the heart "pop" off the page, like a lot of Dine's work.
- Then I showed how to apply the paint, and the students had free range to apply any colors (except black) to the foreground/heart and the background.
- Last but not least the students added splashes of black to the background. The reason I waited to let them apply the black paint because a lot of the time the black starts mixing with the other colors and it doesn't look defined. I usually don't like to "restrict" students creativity, however, that little extra time with out black paint allows the other colors to dry and set what they already created.
- We allowed them to dry on the drying racks and cleaned up the art room.
They really enjoyed doing a one-day project and using the foam pads. They kept saying it feels so soft like a pillow or there favorite stuffed animal.
NOw the first graders are Multi-media artists!


Last picture is to show how the foam comes off of the page or "pops" off the page. (teacher example)
New Layout
Because of our crazy winter weather, here in PA, we have had about 4-5 snow days. These past two days consisting of really nasty ice storms, causing power outages, fallen trees/branches, and terrible driving conditions. Thankfully my power is not out so I have been able to update more and change the Layout a little.
Hope you are staying safe during these icy/snowy days. Also, hope you are enjoying the lessons, if you have any questions or comments please let me know.
Hope you are staying safe during these icy/snowy days. Also, hope you are enjoying the lessons, if you have any questions or comments please let me know.
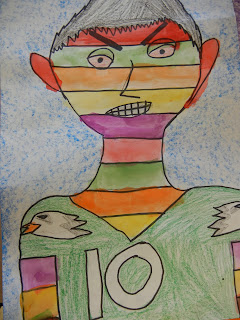
2nd Grade "Bad Case of the Stripes" Self-Portraits
This book, "The Bad Case of Stripes" by David Shannon is absolutely wonderful! When I searched online to see if there were any videos, I stumbled along a website called www.storylineonline.net.
This website has a variety of stories that are read by celebrity people.
At our school teachers use this website all the time to help introduce books, use technology, and show creativity in there lessons. Many 2nd grade teachers already introduced this story to their class, so it turned out to be a great cross curriculum lesson.
I got the idea to use this story from some 2nd grade teachers in my building and also saw some good self portrait ideas from this site self-portraits, and I saw another great lesson that mrs.jahnig did with her 2nd grade classes that was based on "A Bad Case of Stripes."
For this project we used a 11" x 17" white construction paper. We drew our self portraits by adding shapes upon shapes. They drew everything with pencil and outlined with medium Sharpie Marker. They used rulers to measure the stripes, approx. 1" apart from each line. This was a really great way to teach them how to use the ruler, make straight lines, and intergrate math in a simple and fun way. We used crayons to apply color to the hair, eyes, and t-shirt. Some added crayon color to their background. Once finished with crayons, students added color to their stripes and background with tempura cakes (like water color but darker/richer colors).
They turned out great!


Subscribe to:
Posts (Atom)